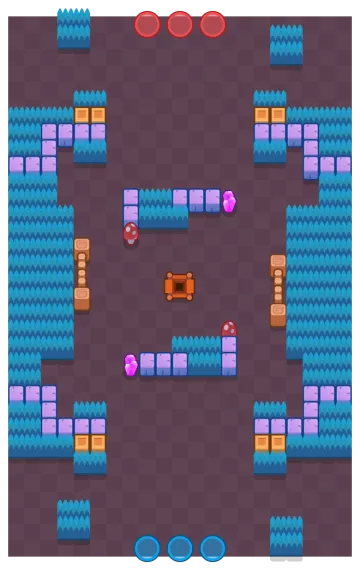
Gem GrabNot in rotation
 Gem Grab
Hard Rock Mine
Hold ten gems as a team and survive a fifteen-second countdown.
Overlays
Annotations are reviewed by hand for this map.
Plan your strategy
Draw routes, mark positions and share a plan with your team. Your draft saves on this device.
How this map plays
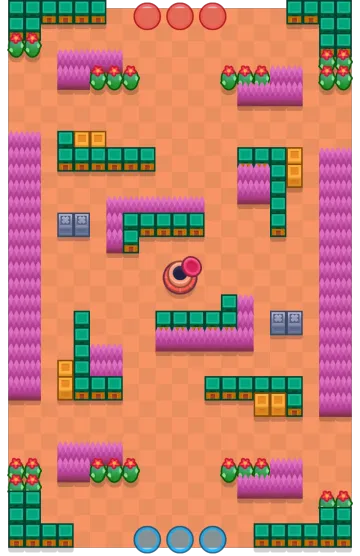
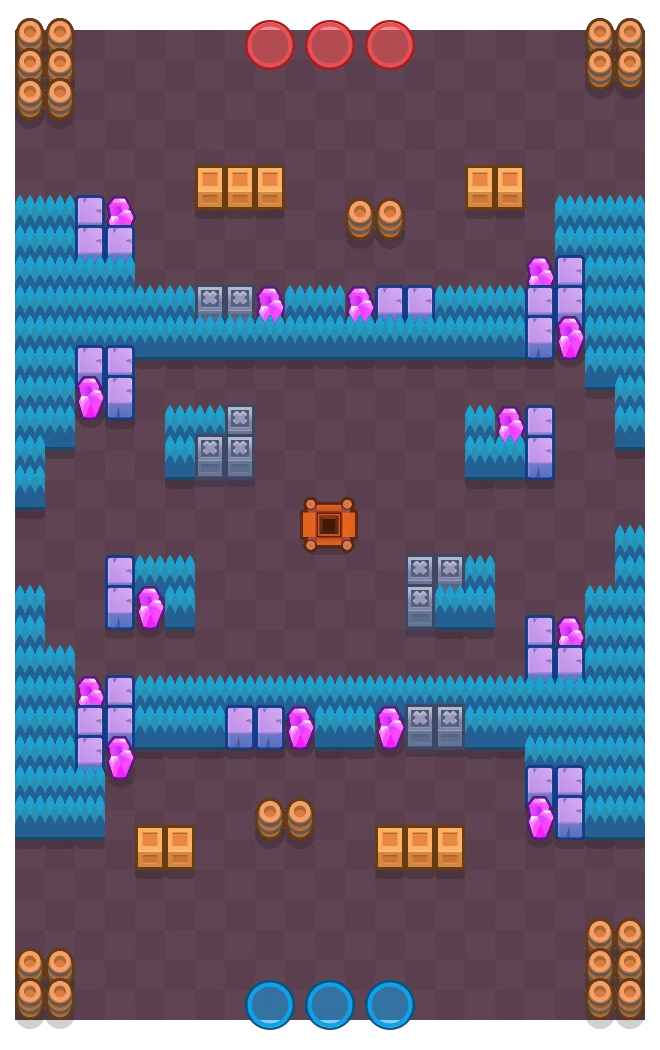
The gem mine sits dead centre in a small clearing, walled off from both spawns by two thick bush belts that run the full width of the map. Almost every fight happens on the seam of those belts rather than on the mine itself. Whoever controls the side lanes decides which team can rotate to the mine without being seen.
- The mine is exactly centre, in a clearing ringed by crate and barrel clusters that give cover on all four sides.
- Two full-width bush belts cross the map, one between each spawn and the mine.
- Deep bush columns run down both outer edges, connecting spawn to mine without crossing open ground.
- Wall clusters sit diagonally off the mine, giving each team a thrower pocket that covers it.
- The spawns are wide open, so a team that gets pushed back to spawn has nothing to hide behind.
What it is built from
ThemeMine
Bushes138
Walls42
Solid walls10
Crates10
Best on Hard Rock Mine
2,309 matches on this mapEpicShade
Rank #1
LegendaryAmber
Rank #2
MythicWendy
Rank #3
Super RareGus
Rank #4
EpicAsh
Rank #5
Super RareRico
Rank #6
MythicJanet

MythicDamian

Reviewed picks
reviewed 19 Jul 2026Barleythe mine clearing is small enough that one bottle covers all of itTickmines on the objective make picking gems up cost healthGenepulls the enemy carrier out of the bush belt and into your teamPamher turret in the clearing sustains a carrier through the whole mid-gameRosathe bush belts are exactly her fight and she wins every one of themPennyher mortar punishes anyone standing behind the mine cover



Team compositions
Mine lockdownBarley · Pam · RosaArea damage on the mine, healing behind it, and a body that owns the bush belt.
Bush controlShelly · Rosa · PocoTwo brawlers who clear bushes on contact, with the sustain to keep re-entering them.

Deny and carryTick · Gene · NitaNita carries safely while Tick and Gene make the clearing unstandable.

Playing it well
- Send the carrier to the side lanes, never through the bush belt — that is where the ambush lives.
- Hold the seam between your bush belt and the clearing; you can see the mine from there without standing on it.
- Clear the belt with area damage before rotating, or you rotate into an invisible Bull.
- At nine gems, pull the carrier back into your own bush belt and make them come through the seam.
- Sudden death collapses the clearing first, so pre-position on the side lane you intend to hold.