Hot ZoneNot in rotation
 Hot Zone
Dueling Beetles
Fill your team's meter to full by owning the marked zones.
Overlays
Annotations are reviewed by hand for this map.
Plan your strategy
Draw routes, mark positions and share a plan with your team. Your draft saves on this device.
How this map plays
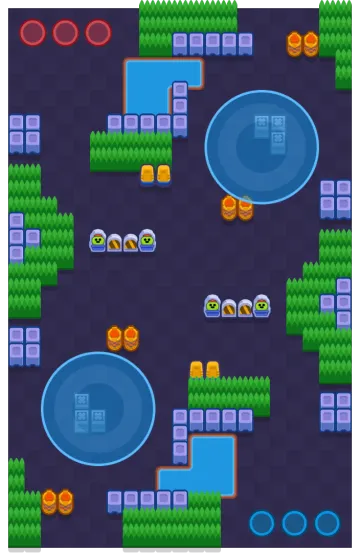
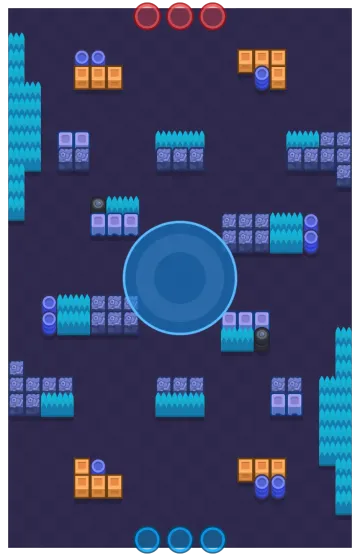
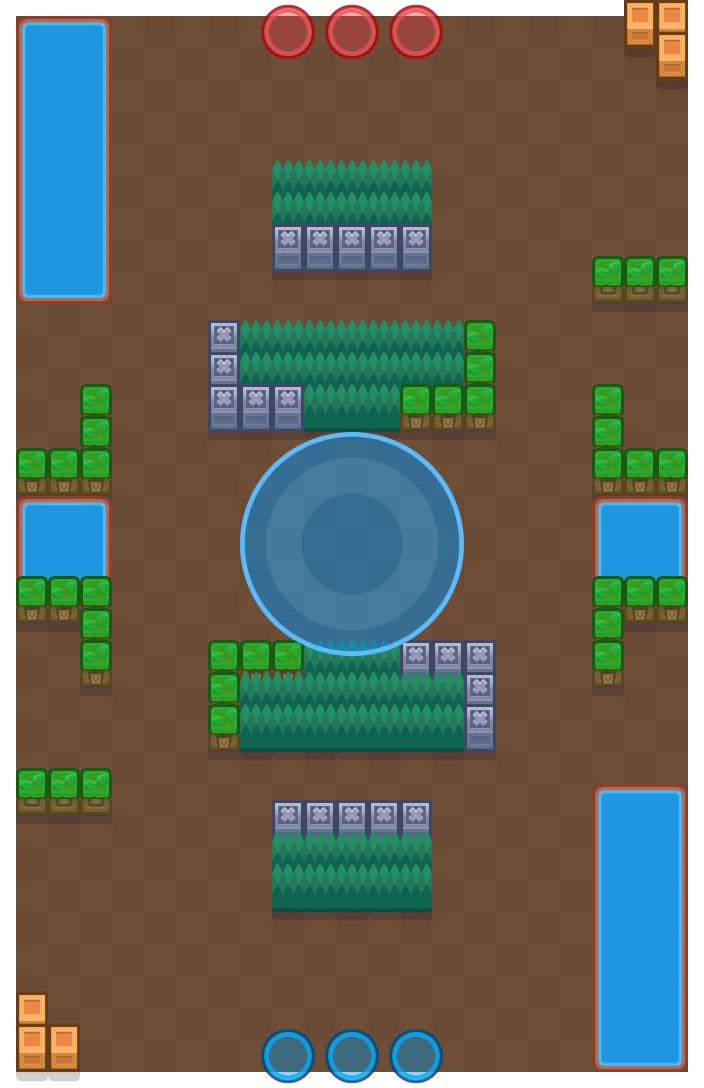
One large central zone with a bush-and-wall bar planted directly above and below it, so both teams approach from cover and meet on the circle edge. Water pools pinch the outer lanes and make wide flanks slow and committal. The team that can hold the zone edge from behind its own bar wins without ever standing in the open.
- A single wide hot zone occupies the centre of the map.
- A bush bar backed by crates sits immediately north and south of the zone, giving each side a firing step.
- Two more bush blocks sit further out, forming a second line in front of each spawn.
- Water pools on both outer edges are impassable and narrow the flank routes to a couple of tiles.
- The left lane between the water pools is the only genuinely open running lane on the map.
What it is built from
ThemeGhost Station
Bushes54
Walls36
Solid walls20
Crates6
Best on Dueling Beetles
1,159 matches on this mapLegendaryAmber
Rank #1
EpicShade
Rank #2
MythicWendy
Rank #3
Super RareGus
Rank #4
MythicDoug

Super RareJessie

EpicAsh
RareBarley

Reviewed picks
reviewed 19 Jul 2026Barleyone bottle covers the whole circle from behind the bush barPennyher mortar hits anyone sheltering on the far side of the zoneRosaholds the circle through chip damage better than anything else on the mapPama turret on the zone edge keeps the holder alive indefinitelyJessieher turret contests the circle without a body having to stand thereSandythe sandstorm makes holding the zone almost free


Team compositions
Zone squatRosa · Pam · BarleyOne body in the circle, one healing it, one making the other team pay to contest.
Double denialBarley · Penny · GeneTwo throwers make the zone unstandable and Gene punishes anyone who tries anyway.
Playing it well
- One body in the circle is enough — the other two hold the bush bar and shoot whoever contests.
- Fight from your bar and step into the zone only when the exchange is already won.
- Contesting is a win when you are ahead on the meter; you do not have to hold it, just deny it.
- The water pools mean a flank is a commitment — send one brawler or nobody.
- When behind, force the fight on the left lane where their throwers cannot cover the ground.