
A beginner's first ten brawlers, and why
Meet ten early brawlers, learn what each one teaches, and choose where to spend your upgrades.
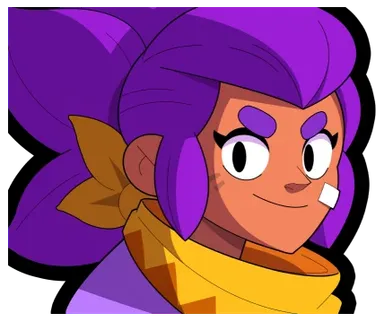
Your early roster fills up quickly. Spend your upgrades on two or three brawlers you enjoy and can use in different modes. Learn their range, timing, and role before spreading resources across the whole collection.
A levelled brawler you understand beats three half-levelled ones you do not, and the gap is wider than it looks, because levelling brings the abilities that change how a brawler is played rather than only bigger numbers. Spreading upgrades evenly across everything you own produces a collection of brawlers that all lose the same fight for the same reason, and no sense of why.
Ten brawlers at half strength is not a roster. It is one brawler's worth of power, divided badly.
Ten that teach ten different things
What follows is not a ranking and it is not measured. It is a teaching set: ten brawlers, each of which forces you to learn something none of the others do, and all of which turn up early enough for the list to be realistic. If your account already holds most of them, the reasons are still the useful part, because they tell you what each one is actually for.
- Shelly. Spacing, before anything else. Her damage collapses past a couple of tiles, so every fight she wins is a fight whose distance she chose. Her Super opens walls as well as killing, which is the first hint that a Super is a tool rather than a finisher.
- Colt. Ammo discipline. Three shots spent on a wall is a lost duel, and the reload leaves you time to think about it. He also teaches that a straight line is a commitment: you shoot where somebody will be, and when you are wrong you are empty.
- Nita. Pressure that is not you. The bear forces the enemy to deal with something while you do something else, which is the simplest version of the two-front problem you will keep building for the rest of the game.
- Bull. Approach angles. Walking at a competent player across open ground with a shotgun does not work, so Bull teaches you to arrive using bushes, walls and other people's reload windows, at the range where you win rather than the one where you started.
- Barley. Area denial. You are not shooting at people, you are shooting at the floor they want and making standing on it expensive. That is the entire idea behind objective play, delivered in its simplest form.
- Poco. Support timing. Healing thrown late does nothing and healing thrown early is wasted, so he forces you to read teammates' health bars, which a surprising number of players never start doing at all.
- Rosa. Bush fighting and the shield window. Her Super gives you a fixed stretch of being hard to kill, and learning to start a fight when that window opens rather than when you happen to see somebody is the whole lesson.
- Jessie. Static placement. A turret in the right spot holds ground while you are somewhere else; a turret in the wrong spot is a gift. Nothing teaches map geometry faster than watching one get shot down for free.
- Darryl. Commitment. His Super closes distance and it also escapes, and you almost never get both out of one charge. Deciding which one it is before you press it is a habit that transfers to every dash in the game.
- Bo. Vision and denial. Mines make ground unsafe without anybody standing on it, and playing around what the enemy cannot see turns bushes from a hiding place into information.
Read the list sideways rather than down and it covers the jobs a team needs filling: someone who can hold ground, someone who can take it, someone who punishes a group that stands still, someone who keeps other people alive, and someone who makes a piece of the map dangerous to walk through. A roster covering those jobs will find something worth playing on almost any map. A roster of five brawlers that all do the same thing will spend half the rotation being the wrong answer.
ShellyStart here. Spacing is easiest to learn on a brawler whose damage visibly falls apart at the wrong range.PocoThe cheapest way to learn that keeping a teammate alive is usually worth more than getting a kill.JessieTurret placement is map reading with immediate feedback attached.


How to use them
- Pick two, at most three, and take those as far as they go before anything else gets a single upgrade.
- Choose them out of modes you actually play. A brawler you enjoy in a mode the rotation shows twice a week will not improve, because you will not play it.
- Get the abilities before chasing the last power levels. Abilities change how a brawler is played; raw statistics only change how long the same mistakes take to punish you.
- Play a run of matches on one brawler instead of switching after every loss. Most losses are positional, and a positional pattern is invisible from inside a single match.
- When you do add somebody new, add one that does a job the first three cannot do at all.
None of this is really about which ten brawlers you own. It is about how many matches you have spent on any one of them. The players who improve fastest look boring from the outside: the same brawler, in the same mode, for a hundred matches, until the mistakes get small enough to be interesting. The roster catches up on its own, and it catches up faster once you can tell why you lost.
Reviewed 20 Jul 2026; revised 3 Oct 2026.